Showing posts with label 330i. Show all posts

Tuesday, June 25, 2019

Trunk Strut Replacement, E90 2006 330i BMW

Trunk Strut Replacement
E90 330i 2006 BMW 

By far the easier repair i've done to the BMW, anybody can do this!

It is very difficult to get something from the trunk with just one hand, because the other hand is busy holding up the trunk lid.... if your struts are bad, you know exactly what I am referring to.

You see after a while the struts lose their ability to hold the trunk UP.  To make your life easier... it's best to replace them.  Very easy problem to fix!

Today we will discuss how to replace them.  These are the steps...

First:
Before you do anything... order the CORRECT struts, it took me 3 tries to get the correct ones.  Make sure they are the correct length, because if they are 1/2 an inch or an inch too long..., you will "STRUGGLE" a lot... to just give up at the end...because the trunk won't close....  I accidentally picked the wrong model of car on Amazon, looking for a cheaper alternative, I accidently picked one that didn't fit my car.  Ofcourse, I didn't find out until they arrived, and they were an inch too long... later I found out they were for a Lexus trunk.... LOL... not sure how I missed that, when I ordered them.

The new replacement struts should be EXACTLY the same size in length...as the old ones, "Extended" of course.
Old struts  -- New Strut(inside bag).  They are exactly the same length.

Second: Removal of old strut
All you have to do is pry on the metal clip and pull away, then pull the strut out.  I used an angled pick, it worked really good.  It's okay if the clip is taken out completely, as they will be thrown away.  The new strut should come with new clip.

Third : Clean
Make sure you clean the Ball where the strut was seating, as you can see mine was very dirty.  If you leave it dirty like this, it will make the ball smaller from the dirt rubbing inside the strut....and then the strut will fall out of the ball... YOU DON'T want to deal with that problem... way more expensive to fix... just clean your balls please.... LOL


Fourth: Grease
Make sure your new strut comes with Grease, check inside the cavity.  If it doesn't have grease, apply a bit inside, don't go crazy, just a little will do.

Installation:
To install the strut just PUSH the strut cavity into the Ball and it will snap in place.

It's that easy!


Close and Open the trunk a few times to make sure the grease takes... The first and second time closing the trunk it will feel weird, like it's stuck, but that is okay, if you keep moving up and down the struts will fee normal... after a few tries.

Service: 
While you are in here, make sure to apply a bit of grease to all of the joints inside the trunk...  You car will thank you for it.  I used standard gear grease.


Where to buy:
I got my struts from Amazon.  Like I said earlier, do you homework, because it's very easy to get the wrong struts from Amazon.

These are the one I got....I am not affiliated to the seller, after a few tries, these were perfect.  The price was competitive too.  Less than $20 dollars shipped, for TWO.

https://www.amazon.com/gp/product/B01C8UG5SK/ref=ppx_od_dt_b_asin_title_s00?ie=UTF8&psc=1


I hope this was helpful to you.

I post a ton of BMW 330I E90 related content, I have a lot of other posts, check them out, link below to the main page.
Comment below if you have any questions...

Thank again and until next time

See all my Blogs posts, link to main page: See them all!


Follow me on Facebook


Thursday, May 23, 2019

Cabin Air Filter Replacement E90

Cabin Air Filter Replacement
BMW 330i 2006 E90  250K miles strong...

So I am guessing that if you are reading this it's because 1 of 2 things happened, either your E90 is telling you it's time to replace the cabin air filter or you just can't stand the smell of a Dirty air filter, or in my case burnt oil smell, mixed in with dirt and old filter, lol.  If that is the case keep reading...

In this post I cover where to buy it, tools as well as instructions on how to replace the filter...

Well... let's get to it...

How to replace the Cabinet air filter 101
If you didn't know the cabin air filter and the engine air filter are two completely different things, they both do the same thing in essence, but the cabinet air filter is meant to keep the inside of the car smelling "good", I am not going to say "nice" because that is not true either, and this is how you do it. 

The Engine air filter is much smaller and it's something we will not cover in today's post.

First
-Open the hood, the latch release is inside the car just to the left of the steering wheel, it's up against the side of where your left foot to rest when driving, Pull once on the lever to release the hood.

Second
- Then go to the front of the car just to lip of the hood and feel for a hood release lever, pull up and you will completely be able to release the hood, then pull up...
The cabin filter is the big rectangular part in the middle of the picture
Inside the plastic part is the actual filter about 3 feet in length
This is the new one

The old one is very dirt and you can actually smell it inside the car,
Believe me it doesn't smell nice, 

The air filter is big...I know it's definitely over kill, but then again not really, I have other cars and they are not as big, but I also don't have to replace them as often, so it's a matter of preference I guess.

Let's continue with the process...

Third
- Next you have to remove 6 screws total to get the filter off, these are it, picture below. 

2 on the side

Again the two screws on the side

The two in the middle of the pictures.
Disregard the two zip ties, they are there for another purpose :)

Then the assembly is off.

Fourth
-Take the old filter out and install new one, it only goes one way, so you can't mess this up.

Tip:  The new filter will have 2 tabs that must go "under" the plastic lip, you will know what I mean when you get to it.  If you did it right it will be obvious...

Fifth
- Then press the filter in and it will snugg in place.  You will need to "Flex" the air filter in place, don't be afraid of it, it's okay to do so.  When I say Flex, I mean push on it and it will flex in place, to its final resting place.

Sixth
- 3 latches snap in place when you did it right.

When you did all of this you are ready to install the assembly back in place...

Re install:

- Put back plastic (cover/filter)... back in the car and install the 6 screws.  Congratulations, that was painless wasn't it... it's that easy.

EXTRA CAR-CARE
While you are replacing the filter, also take some time to clean the duct on the side of the air filter, they get filed with leaves and stuff, this is where the water drains out of the front of the car, so it's a good idea to clean it.

Pull on the plastic mesh up to remove, it's easy, then clean

Pull on the plastic mesh up to remove, it's easy, then clean
TOOLS
You will need a 5/16 socket, it will make your life a bit more easier, with an extension if you have it.
extension is very helpful, believe me!!!

5/16 ths

Where to buy Cabin Air filter:
I usually get my air filter from Amazon, but sometimes when available I just get it from Autozone.
This is the part number if you are interested:
Amazon link:
BMW 2006 330i Cabin Air filter from Amazon  $15 dollars, not very expensive...


I hope this was helpful to you.

I post a ton of BMW 330I E90 related content, I have a lot of other posts, check them out, link below to the main page.
Comment below if you have any questions...

Thank again and until next time

See all my Blogs posts, link to main page: See them all!


Monday, March 18, 2019

Shifter Knob Peeling

Shifter Knob Peeling
BMW E90, 330i, 2006 (240K miles)

I bet every single E90 by now has the Shifter Knob peeling or bubbling, unless you didn't drive it every day like I do, I bet the top of the Shift Knob is starting to show signs of its age, either looks ugly or bubbling or like my shift knob completely bald...lol, it's sad but true...

Sticker or Label, (re-wrap), or Paint?, or Replace:
I've seen on Youtube a few people that decided to re-wrap the shifter knob, but to be different, I plan to paint mine.  Black.

New replacement Cost:
New OEM $80 to $130 from
BMW Part number: 25 16 7 570 652

Amazon replacement : $20 dollars


Disassembly:
I don't recommend taking off the plastic part "white" part.  Because you will break the plastic tabs holding it to the shifter.  I painted mine in place.  By now the plastic will be very brittle and it won't survive you praying on the plastic tabs.  If you must start at the bottom and pray up.
After removing the Aluminum cover, it took me a solid 2 hours to remove all aluminum foil
To get it to this state where all the plastic is white.
How to remove from the car:
It's very easy.  The shifter Knob will come (UP) and out by pressing the shift button, then pulling up on the shift knob (like you are going to shift gears), then pulling up.  It's that easy.  I like to put mine on neutral and then pressing the button and then pulling up.


My personal Fix:
I almost bought a new one, because they are not expensive.  But I wanted to make my own car my own by doing something outside the norm.  So i went with Painting it.  Its up to you to modify in different ways.  You can opt to wrap it, you don't need much material and you can do a funky color if you like.  But I like Black and so I went with Black paint.

I used Rustoleum, because it bonds good to plastic.  Link at the bottom if you want to do the same.


Spray can I used: Rust-Oleum Universal Advanced Formula: Paint & Primer
Prep:
I used tape and printer paper to completely wrap the leather part of the shifter.  Then Paint away.

Let it dry in well ventilated area...


Unwrap all paper and reinstall shifter knob.

To Install simply slide in place and press down hard on it, it will snap back in.

It's not perfect, but looks ok


To see more about my E90, go to the top of the Vlog  : https://msauceda1.blogspot.com/

Good luck to you, and if you find this post helpful please let me know...

Until next time...


Amazon Links:

Thursday, January 10, 2019

Starter Replacement E90 BMW 330i 2006

Starter E90
Starter Replacement E90
E90 330i 2006 BMW  240K miles

As I suspected and feared, my starter went out and there was no way to resuscitate it to move my car to a place where I could fix it, I got stranded, fortunately not too far from home.  If you suspect your starter is starting to go out REPLACE IT! don't wait for the car to just DIE.  The dealer will charge you $800 to $1200 dollars to replace, plus towing fees.  It can be done at home, with some patience.  For only $73 dollars, you can replace it at home.  DON'T wait for it to die, or you will have to get towed home, trust me it's worth replacing before it dies.  Amazon link below where I got my starter.


Symptoms of a bad starter:

Over the months: My car sometimes didn't' want to start, like when a battery is weak.  I almost bought a new battery thinking it was the battery.  I actually put a battery tender on the battery one time to make sure the battery was good, but the result seemed the same.  In the back of my mind I knew it had to be the starter.  

Last few days:  A week before the starter completely stopped, I would press the start button and it would take a solid 4 seconds for the car to start, and it sounded like a weak battery still.

When you press the start button the starter does absolutely nothing.  You do hear a high pitch electrical whirring, if you ever played with a toy motor, and you purposely stopped the motor from spinning, that is the noise you hear.  


Quick tip to make the starter run again.

I watched a video where a guy was hitting the starter to get it going to get you out of pinch, I recommend it.  I didn't try it for my car.  At least try it, find a metal rod or something long to hit the starter a couple of times, it could get you out of having to tow your car home.  Again, if you are stranded at a mall for example.

Do not push the car, because you will ruin the clear coat, believe me my clear coat got ruined, when I pushed the car with my GMC truck, to get it in front of my garage, it was a total mistake.  Bumper to bumper.

How to replace it: Video Includes my tips to make it easier to replace

Remove the screws on the intake manifold and remove the air filter box.  see this video I explain more of what I did. You DON'T have to remove the intake manifold to to replace starter.


You have to replace starter screws, they are one time use!
Note:  You have to buy new screws too, the screws for the starter are one time use only.  They are made of aluminium, and they stretch when they are tightened.  As a result if you try to use them again, they can brake.

Starter Fuse at battery terminal
Only a few people will need this, but if you have a totalled car and the airbags deployed, (Auction Car) there is a cable that needs to be replaced.  It's called the BST cable.  If you have a good starter and the starter won't "start" check this cable.  It has piro to deploy and open cable in the event of an accident.

Google : Battery Cable BST if you want to know more: located at the positive terminal of battery in the trunk.  For the few people that don't know, I figured somebody will find this useful.  If you replaced the starter and it still doesn't work check this cable.

Battery BST cable ,Screen shot


Check code:
My car did not throw a "Starter Defective" Code, not sure if there should be a code, but I scanned my car and nothing came up.  The car just didn't start.  But I figured it was either the battery or the starter, so I checked both and everything is working great.

A few pictures about the process and parts I used:
Intake gasket bag label

extension socket wrench used for bottom screw on starter

Original starter label on starter... Lasted 240,000 miles, unbelievable!

Original Starter back of original one

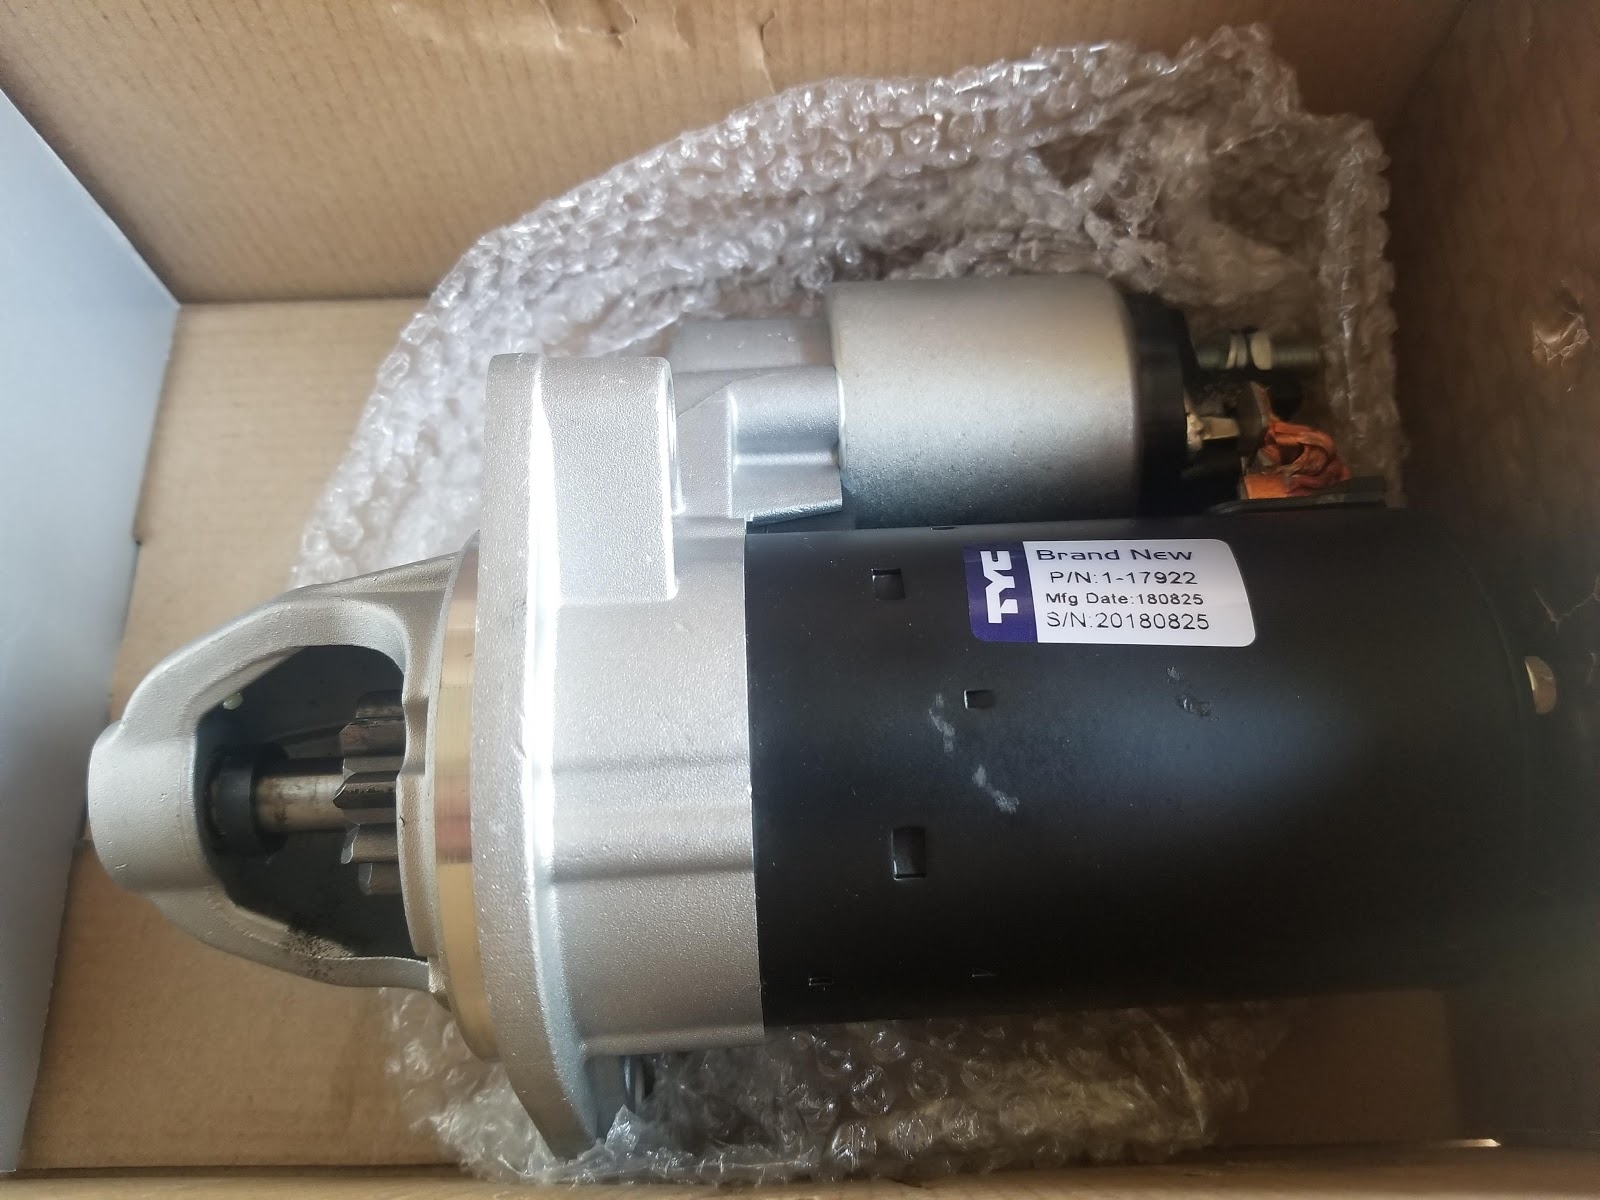
New Starter

New starter, picture of welded copper

New starter teeth

This wrench is the key to the process 11MM wrench, see video above for more

Original starter

New replacement starter, link at bottom of article

New starter, perfect fit, Amazon link at bottom of article

New starter box, got it from amazon

A must!   old screws are one time use.  Long screw goes on the left top, bottom right is the short screw

Intake gasket, the intake is already off, if you never replaced them before, replace them.
More in my video above.

Good luck to you, and if you find this post helpful please let me know...

until next time.


To see more about my E90, go to the top of the Vlog  : https://msauceda1.blogspot.com/


Where to get a new Starter from Amazon: