Monday, July 20, 2020

Clearing Airbag light with Foxwell 510 Elite

Clearing Airbag light with Foxwell 510 Elite 
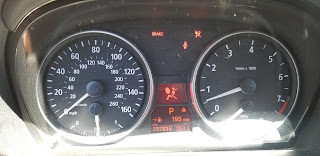
BMW 330I 2006 E90 240K miles

I've been looking online and I am finding out that this problem is huge, lots of people are having the same issue.  The Airbag Light is ON and you can't turn it OFF easily.  In this post I will show you how to clear the code... but you must check a few things which I will go through in this post.  I tried it and it worked...


My Foxwell 510 Elite with BMW software


Side note about my car:
I've been driving my car with the light Airbag light ON for about 6 months, because other than the light being ON, the car drives good, no other issues.  Now I know that in the event of an accident, the airbag may not deploy, but that was a risk I was willing to take.

How did it happen... My Theory...
I had a very bad battery, 3 years old.  they really only last about 2 years.   If it goes beyond that, a lot of the electronics don't like it and they start to "Fail", they are not really bad, but the car thinks they are, because it's not receiving the correct voltage from them.... Thus we get to the Air bag.  

I started to get sporadic failures from the air bag, and they would simply go away after I drove for a day, then it would come back again, when I started the car... Then after a day or so it would go away.

Most people are replacing the "Passenger Seat Occupant Sensor", which is what most would deduce from the failure warning on the Nav Screen... I almost did the same thing, that could be the problem in your car, best thing is to run a scanner like the Foxwell 510 to know for sure.  No guesswork... This scanner will tell you which part is bad: The Occupant sensor, the Seat Belt latch, or the MRS safety battery terminal.  All 3 will give you the same warning message.

Not the Seat buckle...
I checked the Seat buckle which has Pyro on it to deploy in the event of an accident, but it measured good.  about 2 ohms.  I ended up using a piece of zip tie to push up on the connector to measure the true impedance of the circuit.

3 items will show air bag light: (for Passenger Seat Occupant Sensor)
1) Seat buckle (OK on my car)
2) Seat occupancy sensor (OK on my car)
3) Battery MRS (safety battery terminal), located on top of battery. 


Piece of plastic separating the connectors inside the adapter so you can measure it.

It's 2 pins inside.  But they have a Metal piece that shorts the 2 wires.  You have to separate them, like the picture above, so you can measure the resistance.  otherwise it will always read short.

The correct impedance is about 2 ohms.  If it's Open circuit then it's bad for sure.

Clearing the Airbag light with the Foxwell 510 Elite
Plug into the Car
Run a Diagnostics on the car, it will take about 2 minutes, it's about 24 modules total.  For some reason it shows 44 out of 44 modules, but it was actually only 24 modules total

One of the faults will read: Crash safety module ACSM/MRS Fault 

Mine was on Module 20

Don't go into Sub menus of Sub menus of Sub menus, just click on the Quick Diagnostics to get these results, from there you can solve this issue.

You can mess up your car really quick if you start messing with the settings, so be warned, just use the simple Quick Scan Diagnostics settings on the first menu you see... that is it.  That setting will take you to this screen.  Picture below.  

Select and go to "READ CODES" by pressing Enter
It will show a list of the problems... My car showed 3 problems, but when I cleared the problems, the same MRS "Safety battery terminal" continued to show ID 93B2
I cleared the codes first, to make sure it was not a Ghost problem from before, that was not cleared from the computer.

Ran the diagnostics again and then only 1 problem showed up... 93B2 : MRS:Safety battery terminal


I know the MRS Safety battery terminal is the big Clucky thing on top of the battery, it has Pyro on it to disconnect the battery in the event of an accident, it looks like this:
The Red plastic part distribute the power to other modules, next to it, On top on this pictures is a black plastic part, with thick red wire, that is where the Pyro is, and it has 2 very thin cables attached, pictured below...
Sorry for the "THE" typo, it's been a long day.. lol. 

I disconnect the connector and I measured across it (there are 2 pins populated inside), it measured zero Ohms (0.00 ohms) across the 2 pins, so I know the fuse/ Pyro was OK.  So I connected it back and I pushed firmly.  Because that connection I believe was bad, and the true source of my problem

When you disconnect the connector, measure with an Ohmmeter on the wires coming off the battery. press on the side of the connector and push it off to disconnect.

I got in the car again and I cleared the code again and it went away... I was very excited when I finally saw the Airbag light finally go off...

Clearing the Code Two Times (2x)
The airbag light went off after I cleared the code the second time, yes you heard right, after I went and checked the Battery terminal cables.  Not sure why it didn't work the first time, but it worked the second time for me.

Only mention this because I am sure some of you out there want to try this too.  If you go to the dealer to get this repaire, be prepared to pay a lot of money, because they will claim all sorts of things need to be replaced, to get this fixed, you know how it is, they are there to make money by replacing parts in your car.

Little details...
I left out of a few other details, because I am sure you are Knee deep into this issue, and you don't need the little details, but if you do want those details please let me know in the comments below and I will reply to your question there...

I wish you luck fixing this darn air bag warning light...


I hope this was helpful to you!

I post a ton of BMW 330I E90 related content, I have a lot of other posts, check them out, link below to the main page.
Comment below if you have any questions...

Thank again and until next time

See all my Blogs posts, link to main page: See them all!

Follow me on Facebook

Tuesday, July 14, 2020

Headlight Level Regulator arm failure

Headlight Level Regulator bracket arm failure
AKA: Adaptive Headlight control arm
Xenon Level Sensor Arm, Headlight adjustment arm, many different ways to call it...

For BMW 330i 2006 E90

Like most of you I don't really think much of the mechanism needed for headlight steering.  I just assume it's taking inputs from the Steering wheel, it would make sense if they were designed like that, but that is not the case.  It's actually determined by a small mechanism located in the left side, driver side, under the wheel.  As you steer, it moves a small mechanism that determines where the main headlights should be pointed to and adjusts the lights accordingly.  Assuming you have Xenon headlights of course. 

The Problem:
The arm just snapped off, when I was trying to move it, I shouldn't say it snapped of, because it is many many years old, I should say it gave it all it had, and it finally failed.... very easily, after many miles of use.


What is the Headlight Level Regulator bracket arm:
The headlight regulator level is attached to the bracket pictured below.  It moves up and down, to determine if the wheel is moving left or right.  It adjusts the lights accordingly.  


Location:
There is only 1, and it's located under the Driver side Steering knuckle, if you remove the wheel you will see it.

Why did I end up with a broken arm mechanism:
It all started with a change of the shocks.  In order to remove the shocks I needed to remove the little ARM mechanism away so it wouldn't get damaged.  But in the process, I broke it.  It was surprisingly easy to damage, being that it was so old.

Failure point:
The failure point is the area where the bracket meets the arm.  The bracket is crimped on and it's very easily to separate.  And of course mine separated in that way.  


Luckily the part is not very expensive, and VERY EASY to replace.

Tools needed to remove:
You will need (2) 10MM wrench, or a crescent wrench and 10MM.  To remove the clamp, you will need a needle nose pliers, that's it.

You will also need to remove the wheel to get good access, it can be done without removing the wheel but it's more difficult.

Price : $ 10 to 15 dollars, depending on where you get it.
Where I got a replacement : I got mine from FCP Euro, got it very fast.

This is the part number if you are interested
Part number: 37 14 6 763 733


I hope this was helpful to you!

I post a ton of BMW 330I E90 related content, I have a lot of other posts, check them out, link below to the main page.
Comment below if you have any questions...

Thank again and until next time

See all my Blogs posts, link to main page: See them all!

Follow me on Facebook


Monday, March 2, 2020

Custom Adjustable Shocks, BMW E90

Custom Adjustable Shocks
BMW 330i 2006 E90, 240K miles

In this post we will talk about custom shocks for a BMW E90, and the modification needed to install, the delays and modifications needed to install maXpeedingrods-us shocks on a BMW E90.

To start off...
As I drove down the street of San Diego, a huge pothole came out of nowhere and even though I swerved sharply I still couldn't avoid it... Seconds later Bang and Then Pop, I knew something was damaged, I just didn't know what.  But I did start to notice that my car tilted higher on one corner and so I began the ordeal of having to replace the shocks on my car.  This is that story...

Which shocks I got and Why:
The company I ended up going with is Maxspeedingrods,  I chose these shocks because in the pictures they seemed like quality, and the price was right, but I was a bit skeptical before I bought them because I didn't see any reviews of the shocks at all, which is a big red flag, but I figured I would give them a chance.

My Opinion on these Shocks at end of article... Yay or Nay!
I am not affiliated with this company, it just happened that this is where I decided to acquire my new shocks...  If you are interested in seeing more from them, this is there storefront on amazon.

Amazon store front: maXpeedingrods-US Amazon storefront

Alright let's get into it... to start off...

Shipment time (1.5 weeks) to my house
I didn't like that it took about a week and half to get the shocks delivered, I figured they were coming from a far, but I later found out they were NOT coming from a far, the problem was that they were VERY HEAVY, the box they came in was probably expensive to ship to me, so they shipped them "ground".
54 LB Box, came from Dayton, NJ
Box they came in
after unboxing the shocks, packed well, I might ad.
Leaking Shock upon delivery (defective shock):
Upon opening the box and taking the shock out of the bag, I noticed that one bag was full of oil, which I figured was a bad sign, because all other shock bags didn't have any oil inside at all.
Leaking Oil from shock
Vendor feedback for Exchange of defective shock
To my surprise I did get good fast response from the vendor, and upon explaining and sending pictures of the defective shock, (using Amazon email feedback) I did get a replacement shock sent out to me.
Replacement Shock
I removed the other parts off the defective shock and I put them on this shock, and presto, ready to go

Why I couldn't get a refund ($154 dollars to return to vendor):
I planned on sending back the shocks, because of the defective shock, but I quickly found out, thanks to my local UPS lady, that the price to return them was $154.00 dollars, which did not make sense for me to return, because I would be out of shocks and money, if I decided to return them...

Return cost back to Dayton, NJ from San Diego, CA  
Installation: Not an exact replacement fit, as OEM was
I ran into a few problems, mostly with the rear shocks, I expected the shocks to be "almost" exact replacement, I did not expect what ensued...
This is what I needed for installation (washers and extra nut, not included...)
If you go into this project thinking that it's a simple shock replacement, that is not the case, the shock is not exact as the old one in the car, I had to go buy a few things to make what you see in the picture above, to install the shocks... this is not what you get in the box!

What is needed for "easy" installation:
I did finally end up installing the rear shocks, but it took a bit of investigation and good luck.  

This is what I needed, that was not included with the shocks:
(2) M12 1.25 Nut (this nut is exact as the original that came with the new shock)
(4) 1/2 in x 2 in Washers (2 per bag)

The washers I got from local Home Depot
The Nut can be found at home depot also, but my local store did not have it, so I looked for it at another local hardware store.  The hard part was finding out the exact threat, which is 1.25 thread nut it is a NON-standard thread M12 nut, it was the correct thread that I struggled to find.
Must have for installation, not included with shocks
You will need 2 extra of these M12 nuts, otherwise, you can't install the rear shocks.

The Major modification needed:
I had to shave with a grinder the M12 (two) of them, otherwise it wouldn't fit in car.  Used a vice and a grinder, and shaved off a bit of the nut.  Otherwise the two nuts and washer will be too wide and you won't have enough threads on the top nut.

shaved a little off the nut to make sure it fit right

REAR SHOCKS

The nut here is too Thick, and so you need to shave it a bit, so the top nut fits, otherwise you can't thread it in.

Top of Rear shocks

Rear shock installed.

Shocks don't come with the washer, and extra nut for the top of the shock to bolt to thecar


FRONT SHOCKS: Adjustments to new shocks so they fit good in the car


Differences from OEM shock, to replacement adjustable shock from Maxpeedingrods....
The old shock has these dimples, to lock it into place, new one is missing these...
MAJOR DIFFERENCES IN OLD VS NEW SHOCKS

The old shock came with a "needed" bump stop
As a result of the new shock missing the bump stop, you won't be able to use the hardware that came with old shock (rubber bump, shock cylinder dust cover, Installation takes longer to install, etc....), and this is the reason for the modification, to the new shock.  (see washer and nut in picture above, that is what you will need)


Front Shocks (not a perfect fit)
I also ran into a few problems when installing the front shocks, but they were not major, in my "non expert) opinion...

Front shocks ran into support brace
I suggest you install a washer that came with the old shocks
Add this spacer, otherwise the center nut hits the engine bay brace, spacer came with old shocks
Warning about adjustment:
Please note the amount of thread on the shock, don't adjust so low that you only have a few turns into the thread.  Adjust the level with a safe amount of thread.  The threads go about 1 inch into the cylinder, keep this in mind. If you only do a couple of turns, the shock will brake and you will suffer catastrophic failure as soon as you put a load on the wheel, so please be very careful with this!

Front shock adjustment threads...

About ride quality: Very linear
The ride is a hard, I would call it linear, compared to stock, but I am okay with it, because I know I can adjust the ride.  The original shocks have a squishy soft feel, not these shocks.  If you are looking to carve the mountains with your E90, these may be okay for that.

First drive:
The very first time you take it for a ride, keep in mind that the ride will be extra harsh, as the shocks are adjusting at this point, give it a few miles before you judge the ride, because it will take a few miles for the shocks to settle in place.

About Maxpeedingrods
I did get good service from company, I emailed back and forth and I always got a response.  I would also like to add that because of my troubles the company did officer to refund back some of the cost for the parts I had to buy to make the installation possible, so for that I am happy.

No longer listed on Amazon
After dealing with the vendor, after back and forth emails, the post for these particular shocks was removed from Amazon.  I am not saying that it was me that made them remove it, but I did have quite a few emails back and forth with the vendor about problems with the installation of my shocks.  I was going to post a link for these particular shocks, because they were a good price.  But I no longer can...

Like I told the vendor... the shocks are not impossible to install in the car, it just takes somebody with know how to deal with the few curve balls, needed for installation.

Conclusion: Nay
I am not sure I would buy these shocks again, I don't think they are ready for prime time, they need to be finessed a bit more before they should be sold... I am surprised that they were sold as is, advertised as a direct replacement for BMW E90 330I 2006.

 I was disappointed because I hoped this would be a quick replacement, but it was disappointingly not.  Buy at your own risk, if you are handy and you know what you are doing, go for it, otherwise, get something different, with more documentation and with more instructions on installation.


If you have a similar experience please let me know in the comments below.


I hope this was helpful to you!

I post a ton of BMW 330I E90 related content, I have a lot of other posts, check them out, link below to the main page.
Comment below if you have any questions...

Thank again and until next time

See all my Blogs posts, link to main page: See them all!

Follow me on Facebook